HACKING & INTERACTION & MAGIC
In this one week course, you will explore how to use interactive and
︎︎︎ Take me back to the Index
ARDUINO SENSOR GUIDE
Heads up!
Not all available sensors are listed here — these are just some beginner-friendly examples. Feel free to order whatever you’re curious about! You can find tutorials on platforms like Instructables, YouTube, or get help from us — or AI-powered chatbots like Claude.
Important: Be extra careful with electronics running on more than 5 volts.
Also always double-check your wiring and consult multiple sources when experimenting. Incorrect connections can cause components to overheat, break, or even explode.
![]() Depth Sensor
Depth Sensor
HCSR04
With an (HC-SR04) ultrasonic sensor, you can measure distances by emitting ultrasonic waves and calculating the time it takes for the echo to return. This makes it ideal for obstacle detection, proximity sensing, or creating interactive installations that respond to movement.
Wiring to a Arduino Uno
VCC → 5V GND → GND Trig → Digital Pin 9 (or any digital pin) Echo → Digital Pin 10 (or any digital pin)
︎︎︎ Download Arduino sketch to read out distance
︎︎︎ Download Arduino sketch to read out distance and send over Serial
![]()
︎︎︎ Download Arduino + Processing sketch that receives distance over Serial to change font size
︎︎︎ Download package
![]()
RGB Led Strips / Lights
Neopixel Ring
Neopixel Bar
![]() RGBW Ledstrip
RGBW Ledstrip
With RGB LED strips like NeoPixels controlled by an Arduino, you can create colorful lighting effects, animations, and patterns by individually addressing each LED. They're perfect for interactive ambient lighting, or visual feedback in response to sensors or user input.
Wiring to a Arduino Uno
︎︎︎ Download Arduino sketch to play LED animations
︎ Before: in the Arduino software look for the library Neopixel by Adafruit, and install that for it to work
︎ Change NUMPIXELS for the amount of pixels attached
︎︎︎ Download Arduino sketch to play LED animations controlled via Processing
![]()
Buttons
Arcade button
10kΩ resistor
A lot of fun buttons
A button connected to an Arduino can trigger interactive behaviors like changing lights, playing sounds, or starting animations in installations. It is the simplest way to allow visitors to physically engage with the piece.
Wiring to a Arduino Uno
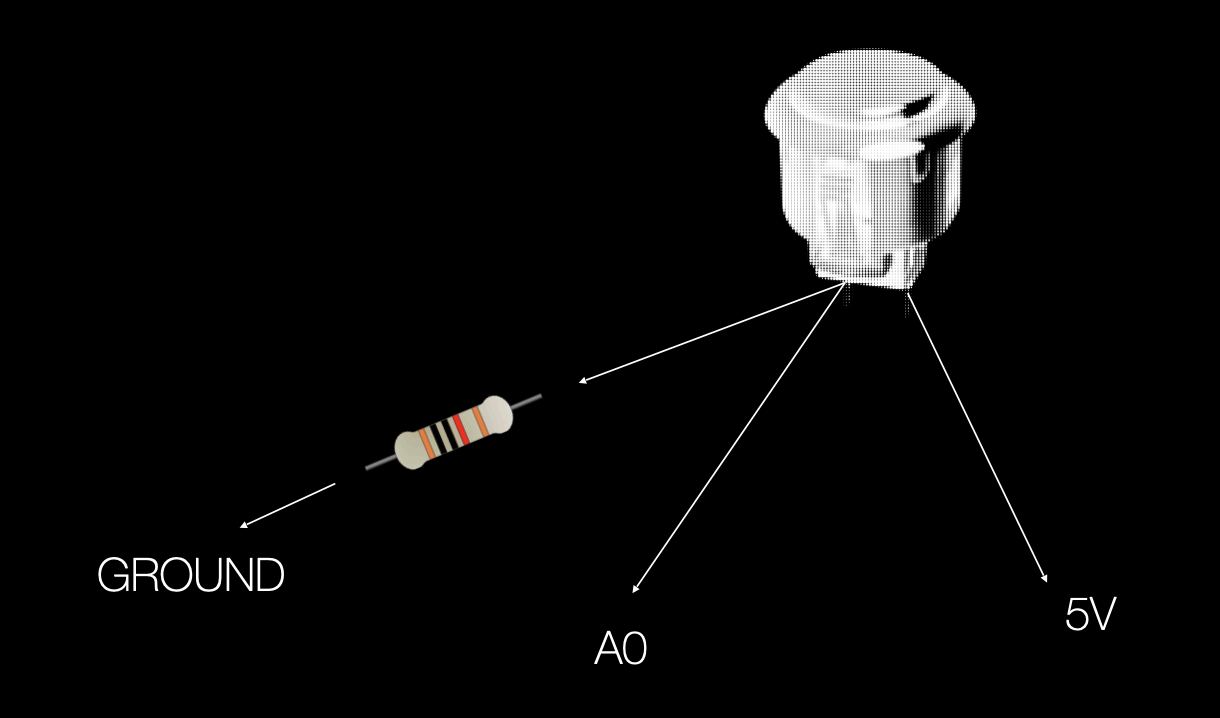
To wire a button to a Arduino Uno you need to work with a resistor.
The resistor prevents floating input values on the Arduino pin. Without it, the pin can pick up random electrical noise and give unstable or false readings when the button is not pressed.
︎︎︎ Download Arduino sketch to read out button press
︎ The code also includes an optional LED connection for visual feedback, using the built-in LED on pin 13 of the Arduino Uno.
︎︎︎ Download Arduino sketch to read out button press and send “pressed” over Serial
![]()
︎︎︎Download Arduino + Processing sketch: Arcade Oracle
![]() Object Movement/Tilt Sensor
Object Movement/Tilt Sensor
3 Axis-Accelerometer
Adafruit Circuit Playground Express (this is a microcontroller like Arduino Uno that has this build in, it is very easy to use more about it here).
With this sensor you can read out magnetic field measurements along the X, Y, and Z axes, making it suitable for sensing orientation and movement relative to the Earth's magnetic field. While it doesn't measure acceleration directly, it can be used to track changes in position and orientation.
Wiring to a Arduino Uno
︎︎︎ Download Arduino sketch to read out the tilt/movement of the sensor
First, install the required libraries:
︎ In Arduino IDE: Tools → Manage Libraries
Search for and install "Adafruit ADXL345" and "Adafruit Unified Sensor"
In this one week course, you will explore how to use interactive and
generative tools in the physical world to tell your story!
︎︎︎ Take me back to the Index
ARDUINO SENSOR GUIDE
Find some example arduino circuits of sensors here to get started
Heads up!
Not all available sensors are listed here — these are just some beginner-friendly examples. Feel free to order whatever you’re curious about! You can find tutorials on platforms like Instructables, YouTube, or get help from us — or AI-powered chatbots like Claude.
Important: Be extra careful with electronics running on more than 5 volts.
Also always double-check your wiring and consult multiple sources when experimenting. Incorrect connections can cause components to overheat, break, or even explode.
 Depth Sensor
HCSR04
With an (HC-SR04) ultrasonic sensor, you can measure distances by emitting ultrasonic waves and calculating the time it takes for the echo to return. This makes it ideal for obstacle detection, proximity sensing, or creating interactive installations that respond to movement.
Wiring to a Arduino Uno
︎︎︎ Download Arduino sketch to read out distance
︎︎︎ Download Arduino sketch to read out distance and send over Serial

︎︎︎ Download Arduino + Processing sketch that receives distance over Serial to change font size
US-016 (Umeå)
︎︎︎ Download package

RGB Led Strips / Lights
Neopixel Ring
Neopixel Bar
 RGBW Ledstrip
With RGB LED strips like NeoPixels controlled by an Arduino, you can create colorful lighting effects, animations, and patterns by individually addressing each LED. They're perfect for interactive ambient lighting, or visual feedback in response to sensors or user input.
Wiring to a Arduino Uno
- GND → GND
- 5V (or VCC) → 5V
- DIN (Data In) → Digital Pin 6 (or any other digital pin)
︎︎︎ Download Arduino sketch to play LED animations
︎ Before: in the Arduino software look for the library Neopixel by Adafruit, and install that for it to work
︎ Change NUMPIXELS for the amount of pixels attached
︎︎︎ Download Arduino sketch to play LED animations controlled via Processing
Buttons
Arcade button
10kΩ resistor
A lot of fun buttons
A button connected to an Arduino can trigger interactive behaviors like changing lights, playing sounds, or starting animations in installations. It is the simplest way to allow visitors to physically engage with the piece.
Wiring to a Arduino Uno
To wire a button to a Arduino Uno you need to work with a resistor.
The resistor prevents floating input values on the Arduino pin. Without it, the pin can pick up random electrical noise and give unstable or false readings when the button is not pressed.
-
Single wire → 5V
-
Wire connected to resistor (10kΩ) → A0
- Wire next to resistor → GND
︎︎︎ Download Arduino sketch to read out button press
︎ The code also includes an optional LED connection for visual feedback, using the built-in LED on pin 13 of the Arduino Uno.
︎︎︎ Download Arduino sketch to read out button press and send “pressed” over Serial

︎︎︎Download Arduino + Processing sketch: Arcade Oracle
 Object Movement/Tilt Sensor
3 Axis-Accelerometer
Adafruit Circuit Playground Express (this is a microcontroller like Arduino Uno that has this build in, it is very easy to use more about it here).
With this sensor you can read out magnetic field measurements along the X, Y, and Z axes, making it suitable for sensing orientation and movement relative to the Earth's magnetic field. While it doesn't measure acceleration directly, it can be used to track changes in position and orientation.
Wiring to a Arduino Uno
- VCC → 5V
- GND → GND
- SDA → A4
- SCL → A5
︎︎︎ Download Arduino sketch to read out the tilt/movement of the sensor
First, install the required libraries:
︎ In Arduino IDE: Tools → Manage Libraries
Search for and install "Adafruit ADXL345" and "Adafruit Unified Sensor"

Light sensors
LDR (for smaller projects)
LDR Resistor
10kΩ resistor
Light sensors detect the intensity of light and can trigger actions based on the level of illumination, such as adjusting brightness or activating components. They are often used in interactive projects to create responsive environments that change according to lighting conditions. But can also be used as communication method between multiple micro-controllers,
Wiring a LDR to a Arduino Uno
To use a LDR you need to work with a resistor.
The resistor prevents floating input values on the Arduino pin.
︎︎︎ Download Arduino sketch to read out light intensity
︎ It converts raw readings (0-1023) to a percentage (0-100%)
︎ It categorizes light conditions as DARK, MEDIUM, or BRIGHT based on configurable thresholds
︎ It toggles the built-in LED (pin 13) based on light conditions
 Light sensor (bigger effect and easier)
Lilypad Light Sensor (recommend! very easy to use and stable)
Wiring the Lilypad Light sensor to a Arduino Uno
︎︎︎ Download Arduino sketch to read out light intensity
 Motors
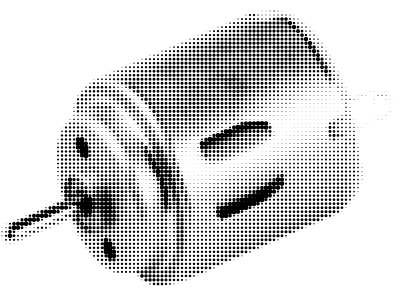
DC Motor
Small DC motor (can turn only on and off, for small projects)
Stepper motors provide precise control over position and rotation by moving in discrete steps, making them ideal for applications requiring exact positioning like robotics or CNC machines. DC motors, on the other hand, offer continuous rotation and are commonly used for simple applications like fans or wheels, where speed control and direction are key factors.
Wiring a DC motor to a Arduino
This will turn on the motor instantly! If you want to be able to turn it on and off you can add a button in your circuit, follow the button tutorial above.
︎︎︎ Download Arduino sketch to turn on and off the motor
︎ Turns the motor ON for 3 seconds
︎ Turns the motor OFF for 2 seconds
 Stepper Motor
Stepper motor (can turn both sides and change speed, you need to order this driver board with it to use it).
Wiring a stepper motor with driver board to a Arduino
- IN1 → Digital Pin 8
- IN2 → Digital Pin 9
- IN3 → Digital Pin 10
- IN4 → Digital Pin 11
- VCC → 5V
- GND → GND
- Stepper Motor Connector → Plug directly into the ULN2003 board
︎︎︎ Download Arduino sketch to make motor turn both sides and at different speeds
Color sensor
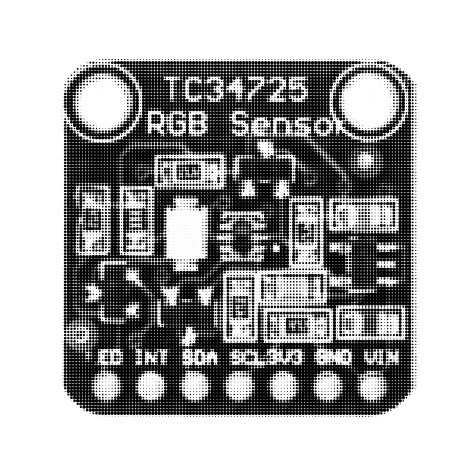
Color sensor: TCS34725
This module can detect the color of incoming light by measuring its precise RGB values, allowing the Arduino to recognize a wide range of colors. It outputs frequency signals that the Arduino can use to calculate the color, making it ideal for interactive projects involving light recognition or color-based responses.
Wiring to an Arduino Uno
- VIN → 5V
- GND → GND
- SCL → A5
- SDA → A4
︎︎︎ Download Arduino sketch to identify colors
Install the required library:
︎ In Arduino IDE: Tools → Manage Libraries
Search for "Adafruit TCS34725" and install it
The required Adafruit BusIO library will be installed automatically

Pressure sensor
Force sensor vierkant
10kΩ resistor
This square force-sensitive resistor detects pressure from 20 grams up to 10 kilograms, making it ideal for sensing touch or force in interactive setups. It's commonly used in robotics, pressure-triggered installations, or projects like wearable drum kits.
Wiring to an Arduino Uno
- One leg → 5V
- Other leg → Analog Pin A0 and a 10kΩ resistor to GND
︎︎︎ Download Arduino sketch to measure the pressure
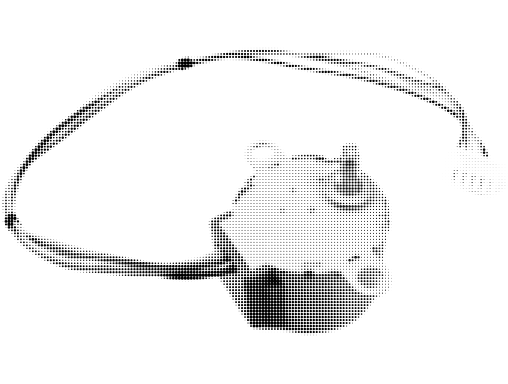
 Sense Position
Circular Soft Potentiometer Ribbon Sensor Adafruit 1069
(Tip! A bit more expensive but very easy to use)
This flexible, circular ribbon sensor detects touch position along its surface, acting like a soft potentiometer. It’s perfect for interactive art, sound control, or motion-sensitive installations where users can intuitively control parameters by sliding their finger along the ring.
Wiring to an Arduino Uno
- Pin 1 (one outer leg) → GND
- Pin 2 (center wiper) → Analog Pin A0
- Pin 3 (other outer leg) → 5V
︎︎︎ Download Arduino sketch to measure the position on the circular ribbon

Heartbeat
Heartbeat sensor (easy but the effect is a bit underwhelming)
This sensor detects changes in blood flow using light, allowing it to measure your heart rate. It can be used in interactive projects to trigger visuals, sounds, or behaviors based on the rhythm of a person’s pulse, making it ideal for biofeedback-based installations or wearable tech experiments.
Wiring to a Arduino
- VCC → 5V
- GND → GND
- Signal → Analog Pin A0
︎︎︎ Download Arduino sketch to read out heartbeat per minute
 Weight sensor
Weightcell small (tm 50kg) Amplifier
A load cell measures force or weight by converting mechanical pressure into a small electrical signal. When combined with an HX711 amplifier, it becomes suitable for weight-based interaction in projects like smart scales, pressure-sensitive installations, or physical feedback systems.
Wiring to an Arduino Uno (with HX711 amplifier)
- Load Cell → HX711
- Red (Exc+) → E+
- Black (Exc–) → E–
- White (Sig+) → A+
- Green (Sig–) → A–
HX711 → Arduino Uno
- VCC → 5V
- GND → GND
- DT → Digital Pin 2
- SCK → Digital Pin 3
︎︎︎ Download Arduino sketch to read out weight with amplifier

Weight
Weightcell (tm 5kg very accurate)
Wiring to an Arduino Uno (Without Amplifier)
-
Load Cell → Arduino Uno
-
Red (Excitation +) → 5V
-
Black (Excitation -) → GND
-
White (Signal -) → Analog Pin A0
-
Green (Signal +) → Analog Pin A1
Note: Directly connecting the load cell without an amplifier will lead to weak and unstable signals. Using an amplifier like HX711 is highly recommended for reliable readings.
︎︎︎ Download Arduino sketch to read out weight
Infrared
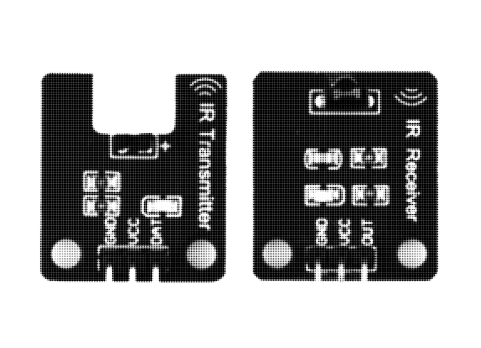
Receiver + Transmitter set
This set includes an IR transmitter and receiver that operate at 38kHz, commonly used for creating remote control systems. With simple wiring, the transmitter sends data over infrared light, and the receiver picks up that data, allowing wireless control of various devices, such as robots, media centers, or lighting systems.
Wiring to an Arduino Uno
- IR Transmitter
- VCC → 5V
- GND → GND
- Data → Digital Pin (e.g., Pin 3)
- IR Receiver
- VCC → 5V
- GND → GND
- Data → Digital Pin (e.g., Pin 2)
︎︎︎ Download Arduino sketch to read out and send infrared messages
First, install the required library:
In Arduino IDE: Tools → Manage Libraries
Search for "IRremote" (by shirriff) and install

Temperature
DS18B20 Module
The DS18B20 temperature sensor can accurately measure and read temperature. By integrating it into your setup, you can trigger changes in the installation based on real-time temperature data.
Wiring to an Arduino Uno
- VCC → 5V
- GND → GND
- DQ (Data) → Digital Pin 2
︎︎︎ Download Arduino sketch to read out temperature
First, install the required libraries:
Search for and install "OneWire" by Paul StoffregenSearch for and install "DallasTemperature" by Miles Burton
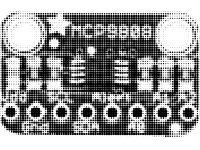
I2C Adafruit (very accurate a bit more expensive)
The MCP9808 is a high-accuracy temperature sensor that communicates via I2C, offering precise temperature readings with an accuracy of ±0.0625°C.
This sensor’s high precision makes it perfect for creating installations that respond to subtle temperature variations, adding an extra layer of interactivity.
Wiring to an Arduino Uno
- VCC → 5V (or 3.3V, depending on your system)
- GND → GND
- SCL → A5 (SCL Pin)
- SDA → A4 (SDA Pin)
︎︎︎ Download Arduino sketch to read out temperature
In Arduino IDE: Tools → Manage Libraries
Search for "Adafruit MCP9808". Install the library (the required Adafruit_BusIO library will be installed automatically)

Door sensor
This magnetic sensor detects the opening and closing by using a magnet and a sensor switch. The switch closes when the magnet is near, and opens when the magnet is moved more than 20mm away, making it ideal for security applications such as alarm systems or access control.
Wiring to an Arduino Uno
- Sensor (COM) → Digital Pin (e.g., Pin 2)
- GND → GND

NFC
NFC-kit
This NFC kit allows you to read RFID cards and tags using the included reader, making it perfect for interactive projects involving identity recognition or access control. It can trigger specific responses in an installation when a unique tag or card is scanned, enabling personalized or playful interactions.
Wiring to an Arduino Uno (using MFRC522 module)
- SDA → Pin 10
- SCK → Pin 13
- MOSI → Pin 11
- MISO → Pin 12
- IRQ → Not connected
- GND → GND
- RST → Pin 9
- 3.3V → 3.3V (Do not connect to 5V)

Moist Sensing
Moist Sensor
This sensor detects how much moisture is in the soil, perfect for interactive art installations where plants can "speak" or trigger automation. It acts like a variable resistor: the wetter the soil, the lower the resistance.
Wiring to an Arduino Uno
- VCC → 5V
- GND → GND
- AOUT → A0 (analog input)
Relay
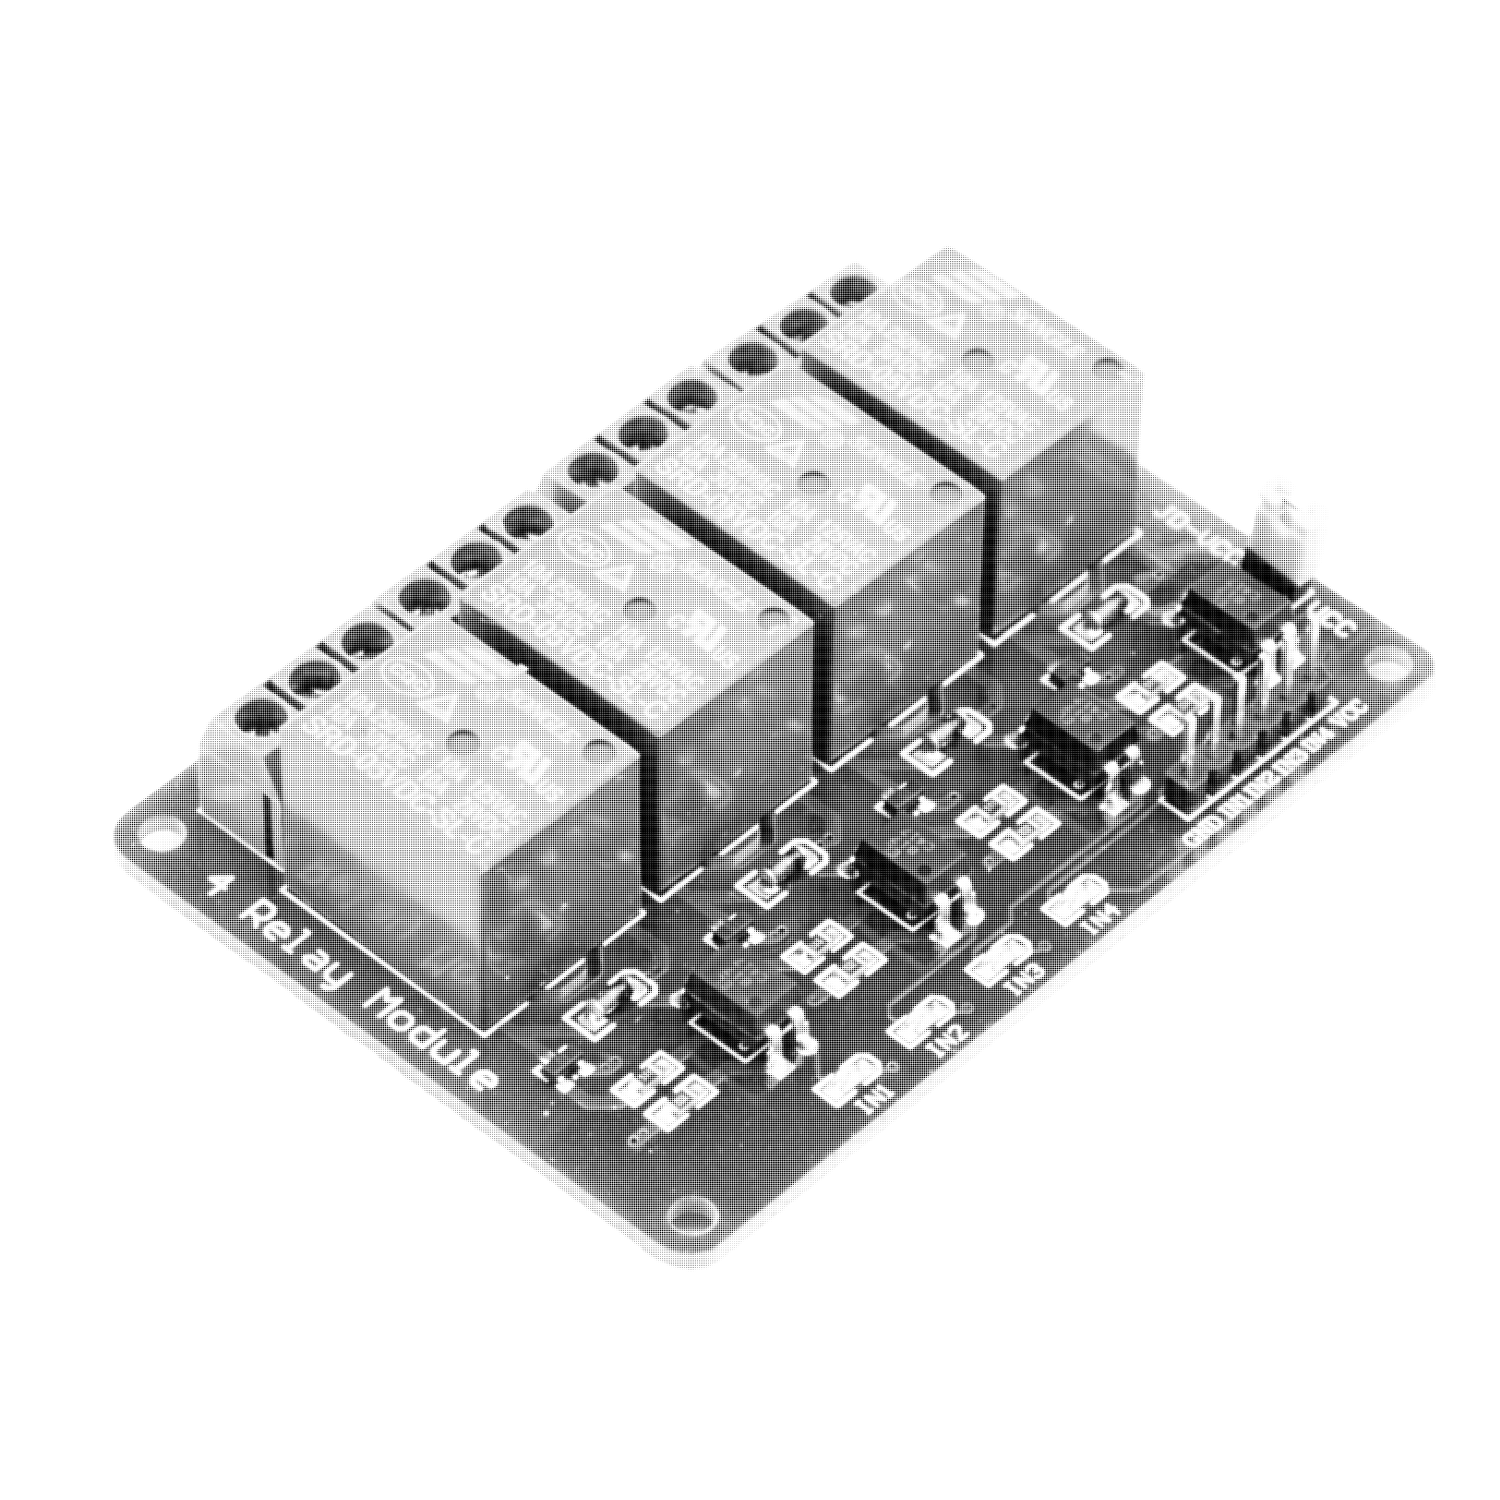
Relay 5v 4 channel (there are many variations depending on the amount of power you want to switch and amount of channels you want).
This can be a bit complex
This can contain high voltage, do this in the class!
4-Channel Relay Module (5V)
This module allows an Arduino to control up to four high-power devices, such as lights, motors, or pumps, by switching them on or off using relays. Each relay is active low, meaning it switches when the input pin receives 0V (LOW signal from Arduino).
How to Connect to an Arduino Uno:
- GND → GND
- VCC → 5V
- IN1–IN4 → Digital pins (e.g., D2–D5)
Specifications:
- Control voltage: 5V
- Current per relay: ~70mA
- Max switching: 250V AC / 10A or 28V DC / 10A
Tutorial
 Led Matrix
Led Matrix + Break-out Red
This LED Matrix lets you display scrolling text, pixel patterns, or animated visuals—perfect for interactive art installations where data, sound, or sensors can control the visuals. It’s driven by the MAX7219 chip, which makes it easy to control many LEDs with just a few wires. You can even chain multiple displays together to create larger animated messages or grids.
Wiring to an Arduino Uno
- VCC → 5V
- GND → GND
- DIN → D12
- CS → D10
- CLK → D11
LCD Screen
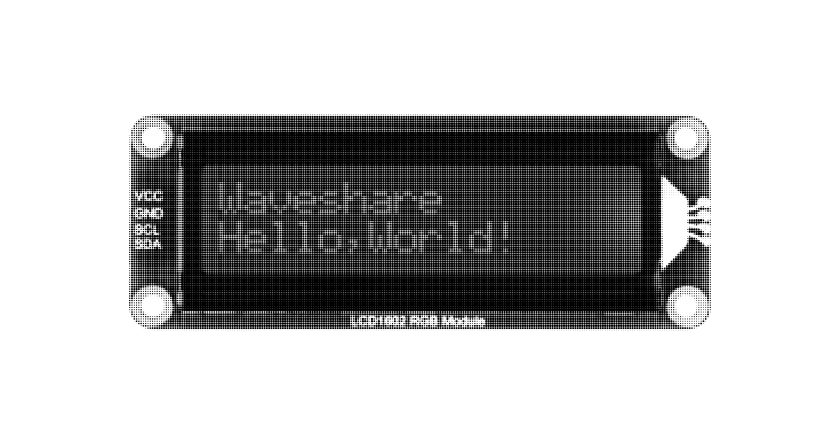
Waveshare RGB LCD (this is very easy to use, and you can change the background color)
This RGB LCD screen is easy to use and features a customizable background color, perfect for interactive installations where color and text need to change. It’s simple to wire and connect to your Arduino.
Wiring to an Arduino Uno
- VCC → 5V
- GND → GND
- SDA → A4 (analog pin)
- SCL → A5 (analog pin)
Also consult their detailed tutorial

I2C LCD (cheaper and more common, blue back light make sure that you get it with I2C backpack otherwise its very hard to connect)
This 16x2 LCD screen is a classic choice for Arduino projects, offering two lines of text with 16 characters per line. With its blue backlight and white characters, it’s perfect for displaying basic information or sensor data. The I2C interface allows easy connection with just 4 wires, making it a go-to display for beginner projects or simple interactive installations.
Wiring to an Arduino Uno
- VCC → 5V
- GND → GND
- SDA → A4
- SCL → A5
 Sound
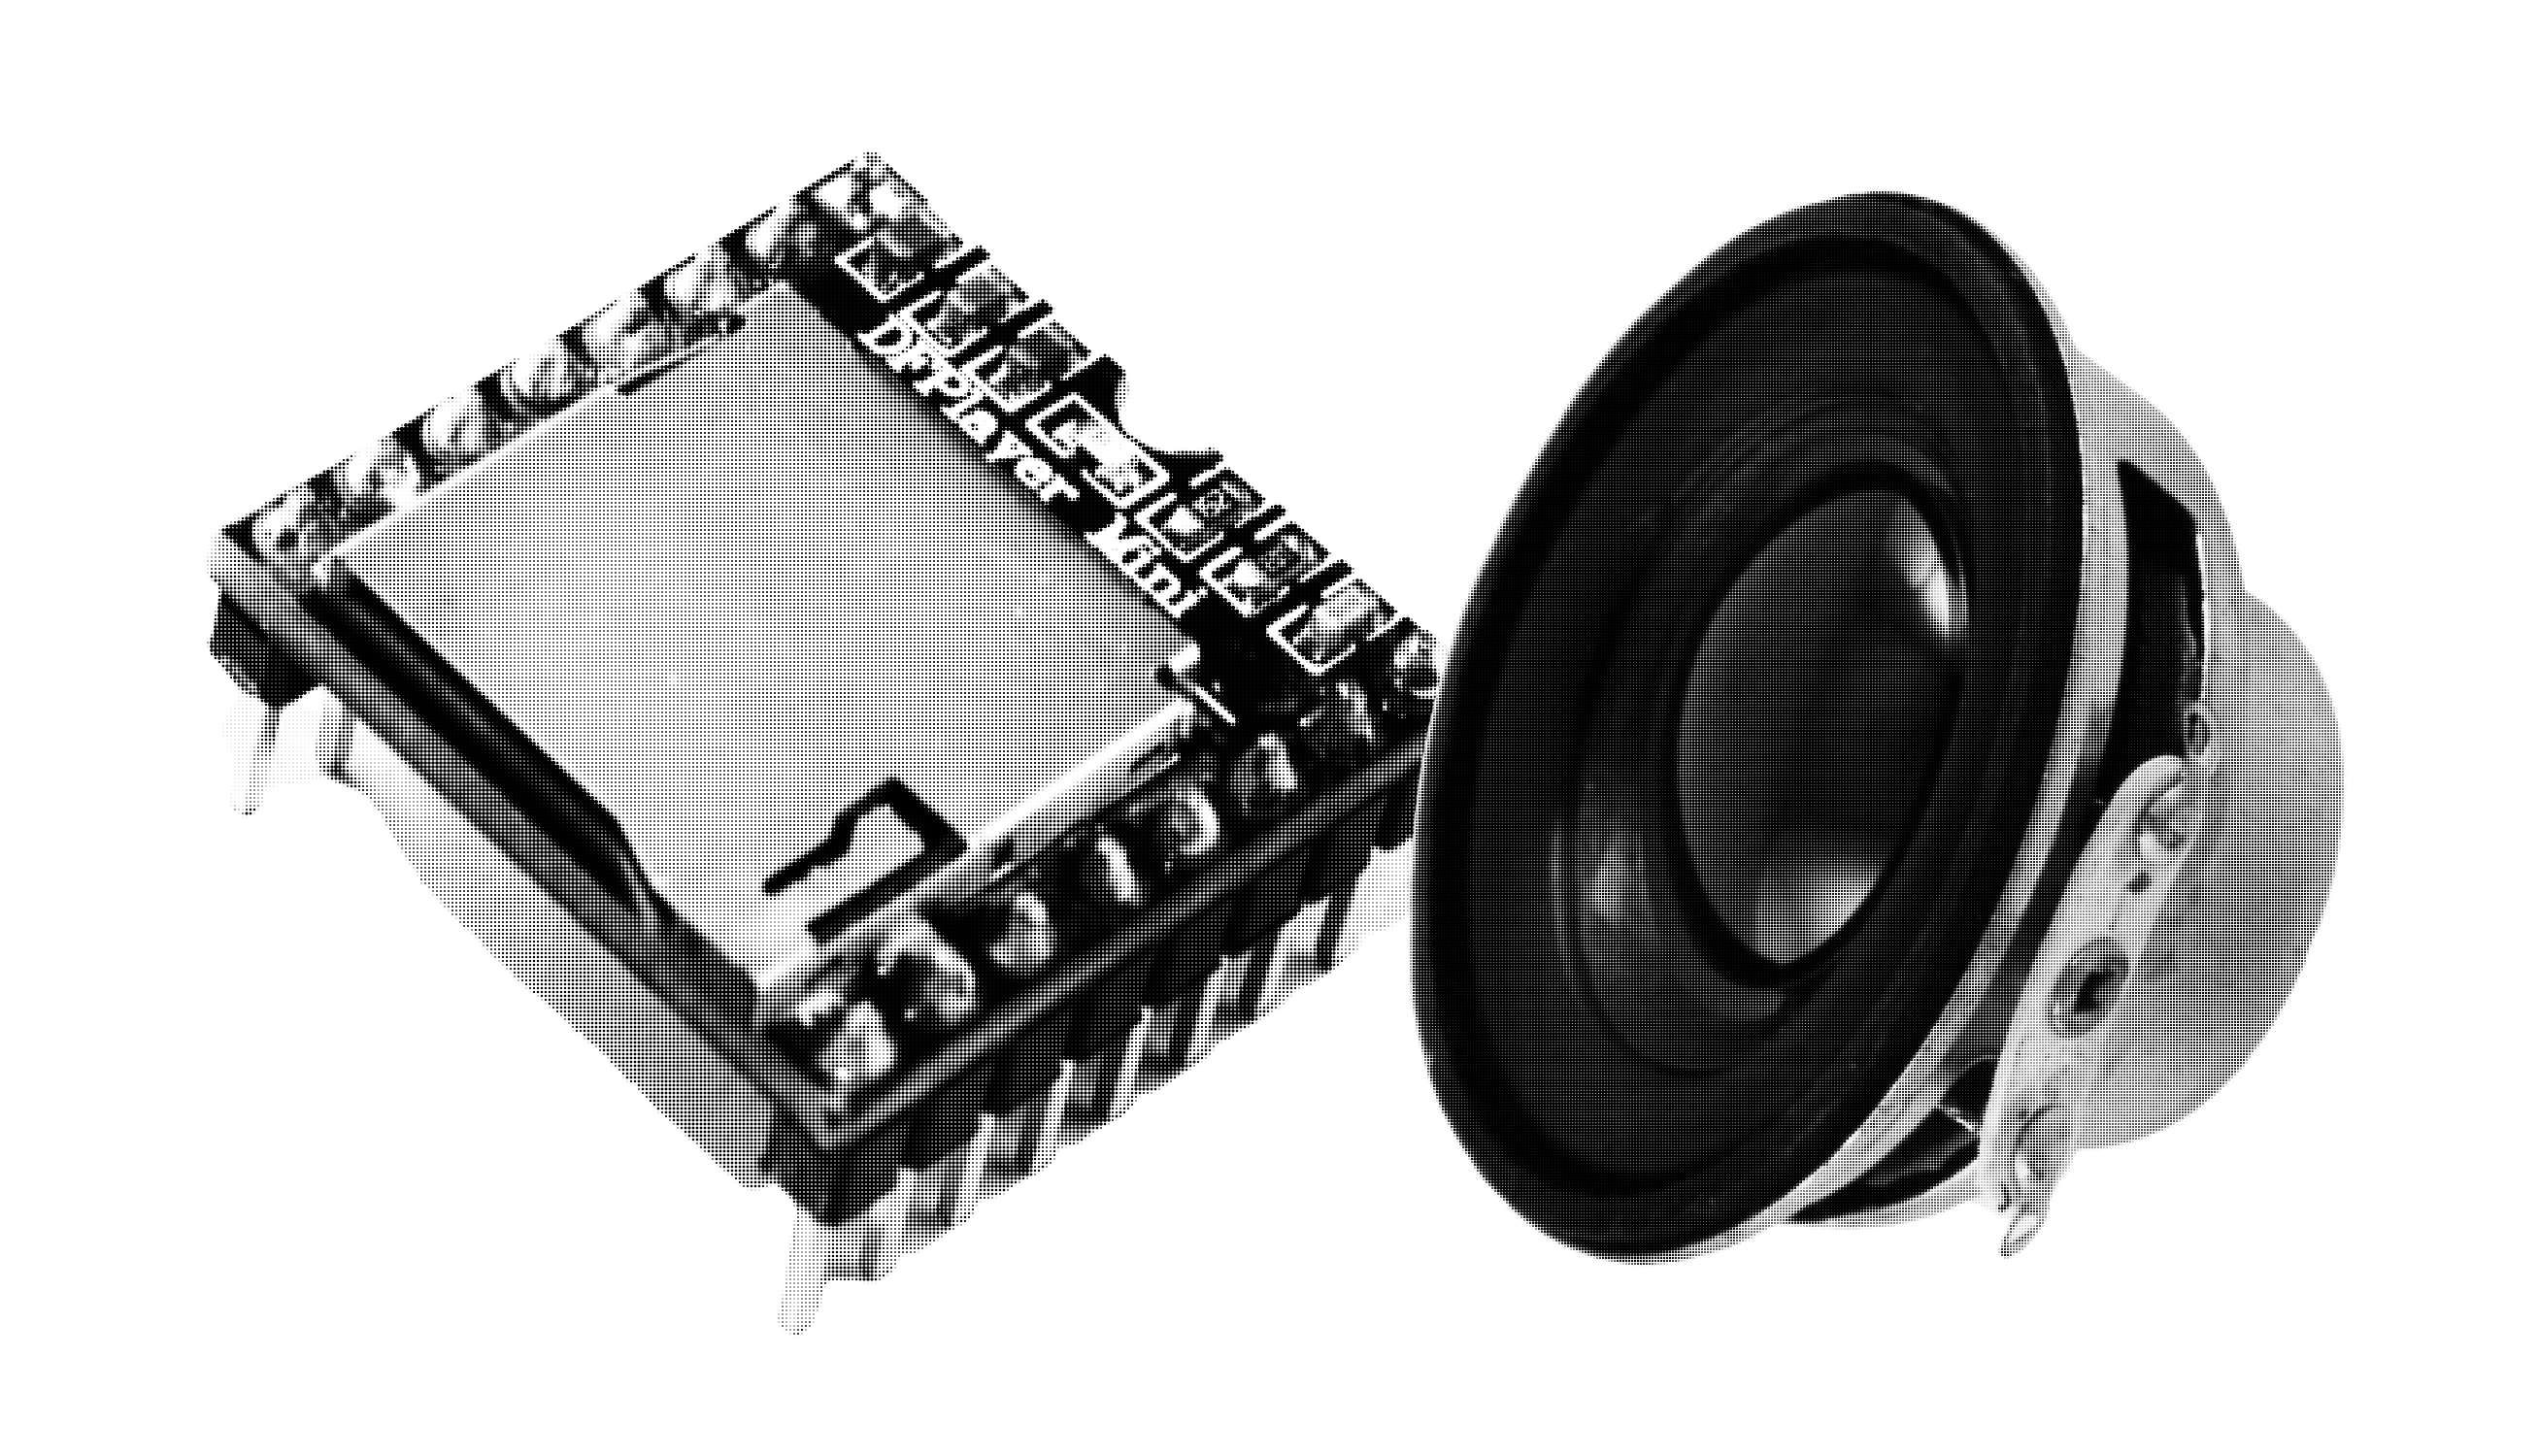
SoundMp3 module + Speaker
Mp3 Module: DFplayer Mini
Small Speaker (you can pick any size)
Micro SD card
This can be a bit complex
This compact MP3 module, the DFPlayer Mini, allows you to add sound capabilities to your Arduino projects. It plays MP3 files from a microSD card and can easily be integrated with a speaker. Perfect for adding interactive sound elements to installations or creating a sound-triggered art piece.
Wiring to an Arduino Uno
- VCC → 5V
- GND → GND
- TX → Pin 11 (SoftwareSerial)
- RX → Pin 10 (SoftwareSerial)
- SPK+ → Positive terminal of the speaker
- SPK- → Negative terminal of the speaker
Tip: Make sure to format the microSD card correctly, and place the MP3 files in the root directory. You can use the DFPlayer library to control playback, pause, and volume from your Arduino code.
Piezo
Electronic Buzzer
The Piezo Buzzer can produce sound alerts, play tones, and generate rhythmic patterns, adding audio feedback to your projects. It can also be used for vibration alerts, signal indications, and interactive responses, such as providing feedback when sensors are triggered or when actions are completed.
Wiring to an Arduino Uno
- VCC → 5V
- GND → GND
- Signal Pin → Any digital pin (e.g., Pin 8)
Sparkfun Sound Detector
The SparkFun Sound Detector is a small and easy-to-use microphone board that outputs three different signals: envelope, gate, and audio. The envelope provides an analog voltage proportional to the loudness of incoming sounds, while the gate offers a digital on/off signal whenever the sound crosses a certain threshold. The raw audio output can be used for more advanced sound processing if needed.
This sensor is perfect for interactive projects that respond to sound, such as light installations that react to claps, games triggered by voice, or visualizations that change with ambient noise levels. With just a couple of wires to your Arduino, you can start measuring sound intensity or detecting events, making it a flexible and beginner-friendly tool for creative coding and physical computing.
Wiring to an Arduino Uno
︎︎︎ Download package
︎︎︎Processing sketch with Steps
The SparkFun Sound Detector is a small and easy-to-use microphone board that outputs three different signals: envelope, gate, and audio. The envelope provides an analog voltage proportional to the loudness of incoming sounds, while the gate offers a digital on/off signal whenever the sound crosses a certain threshold. The raw audio output can be used for more advanced sound processing if needed.
This sensor is perfect for interactive projects that respond to sound, such as light installations that react to claps, games triggered by voice, or visualizations that change with ambient noise levels. With just a couple of wires to your Arduino, you can start measuring sound intensity or detecting events, making it a flexible and beginner-friendly tool for creative coding and physical computing.
Wiring to an Arduino Uno
- VCC → 5V
- GND → GND
- GATE → 2
- ENVELOPE → A0
︎︎︎ Download package
︎︎︎Processing sketch with Steps
Sparkfun Sound Detector
Search for Library:
SparkfunSerialGraphicLcdDemo as a start!
︎︎︎ Package of Arduino + Processing connection
Serial Receive in Arduino IDE from Processing
︎︎︎ Package of very simple connection between the two :)
MAKING ARDUINO COMMUNICATE
WITH OTHER SOFTWARE
(will be extended later)
The real fun begins when your Arduino circuit doesn't just gather data — but starts to influence your installation.
You can make visuals change, sound react, or even trigger movement based on sensor input.
Here are a few ways to connect Arduino to other software environments:
Arduino + Processing
Processing is a visual coding tool that's great for interfacing and creative output.
In the software Processing there are two ways of communicating with Arduino.
Serial Communication – the simplest method, where Arduino sends data to Processing over USB.
In the Sensor Guide you can find examples for your specific sensor!
Firmata Protocol – allows Processing to fully control the Arduino's pins in real-time, without uploading new Arduino code.
Arduino + Touch Designer
TouchDesigner is a powerful visual tool used for interactive installations.
You can receive sensor data from Arduino via Serial In DAT or CHOPs, letting your visuals react to the physical world.
Arduino + Python
Using libraries like pyserial, you can write Python scripts that read sensor values or control actuators via Arduino.This is a bit advanced but perfect for automation, data analysis, or custom control systems.