hacking + interaction &&&&MAGIC
In dit skills blok onderzoek je hoe je
︎︎︎ Terug naar de hoofdpagine
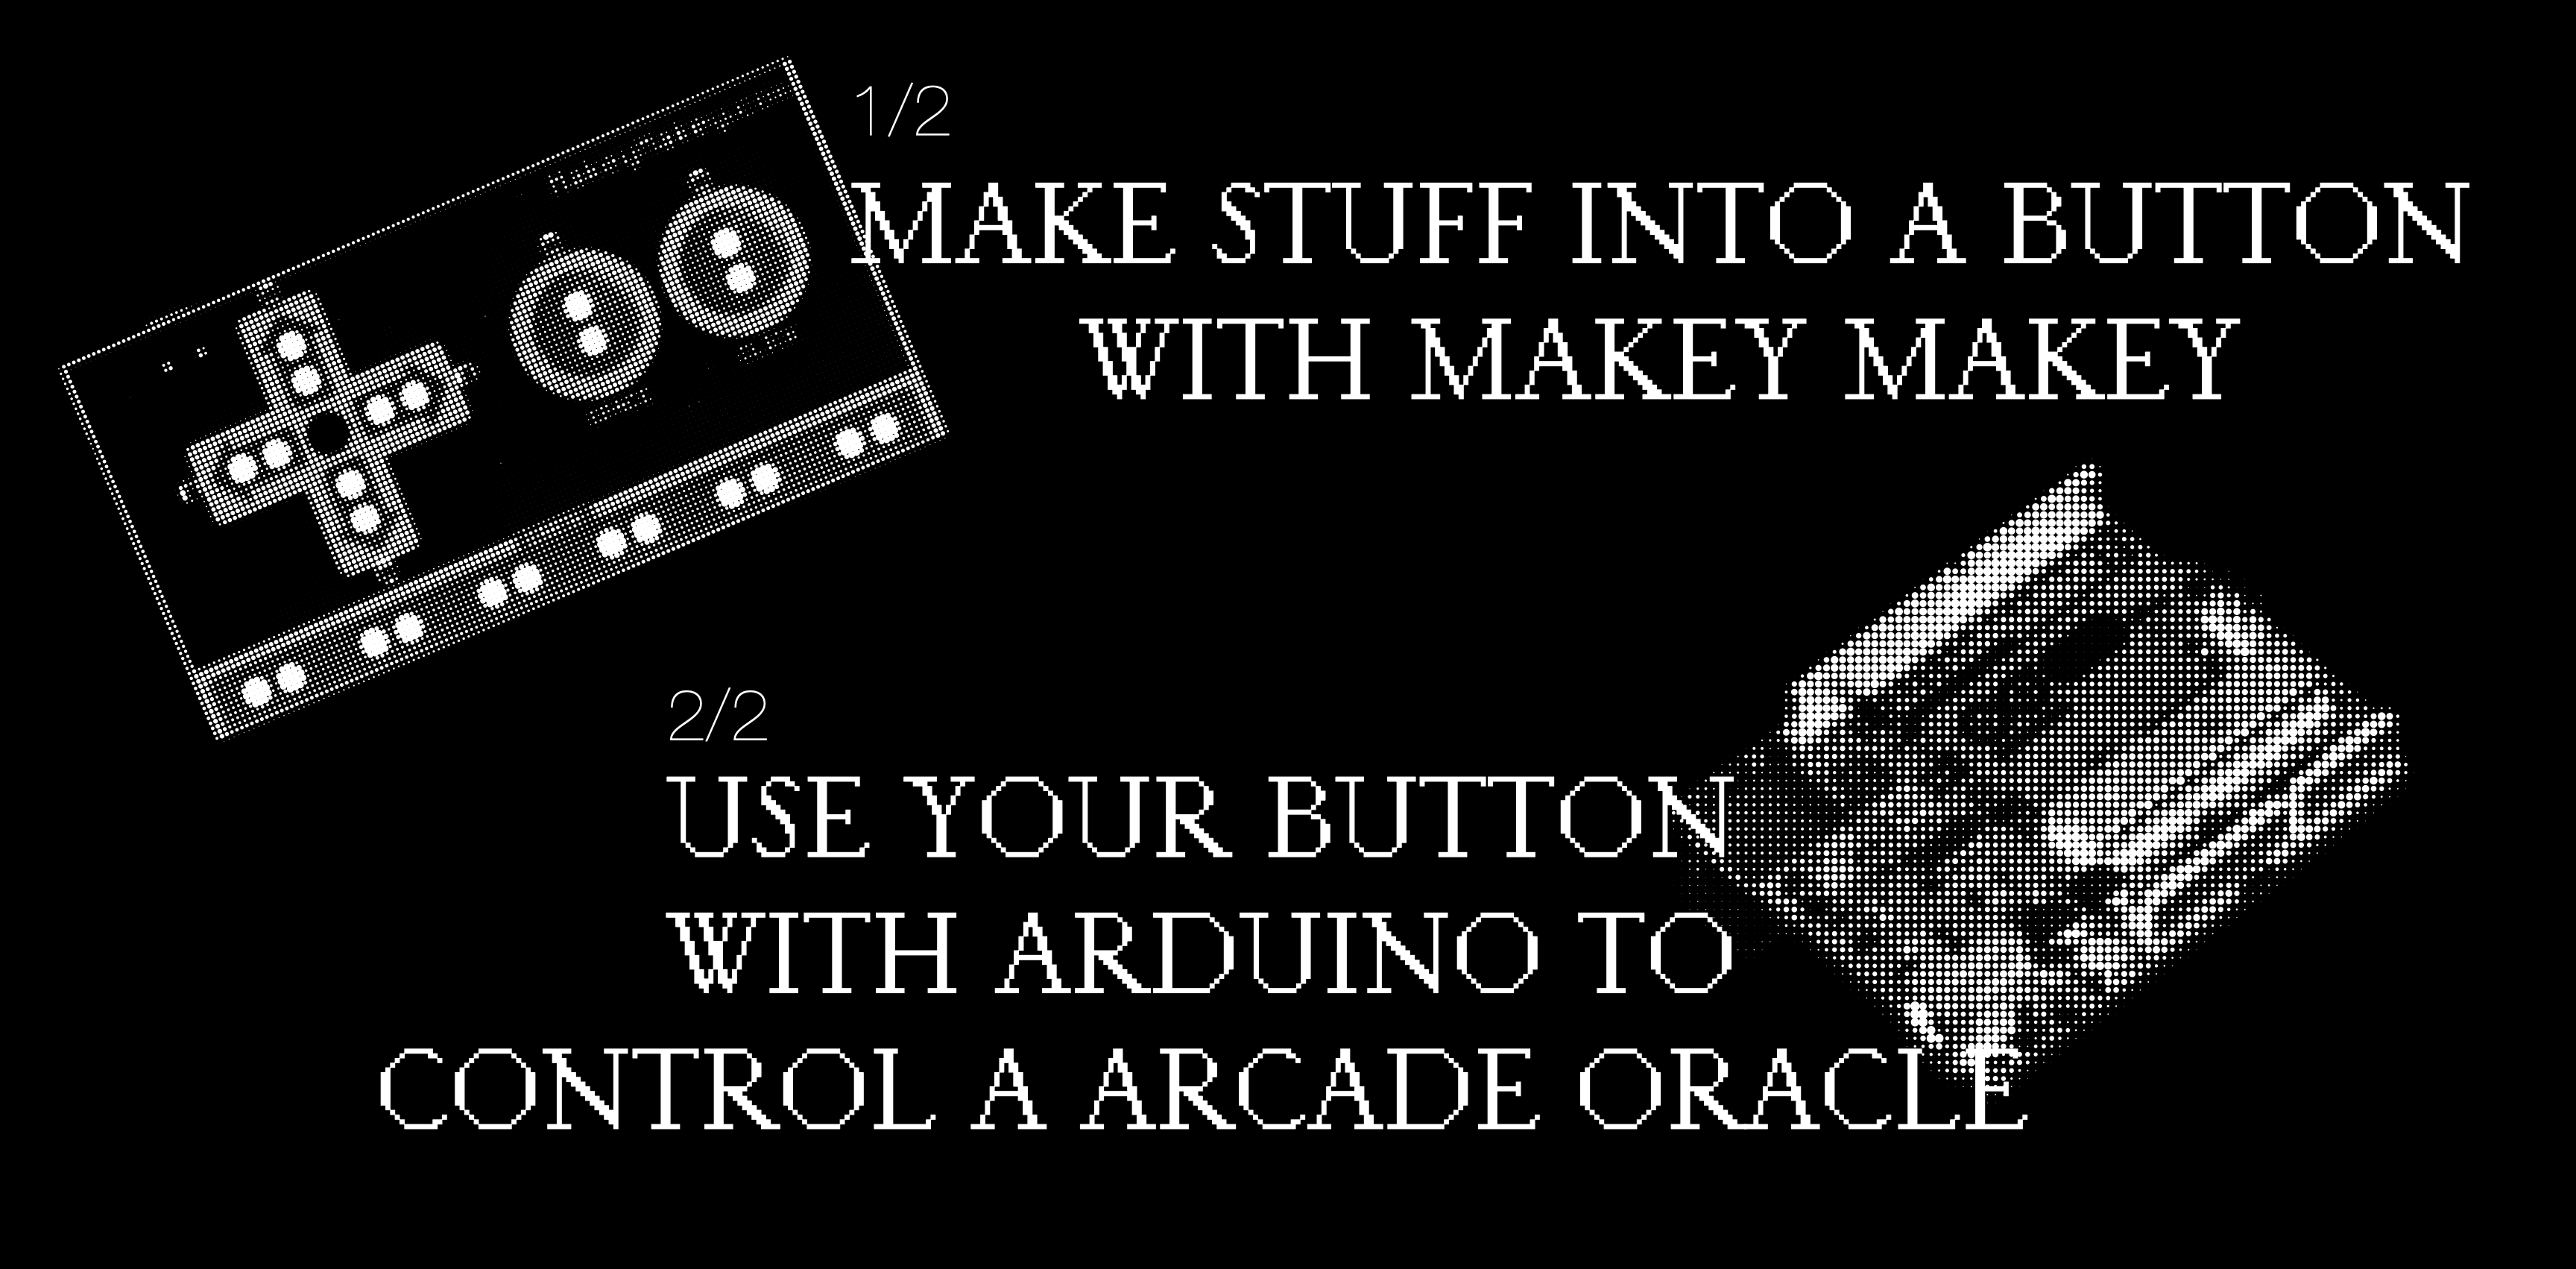
workshop 1: arduino + makey makey + button hacking
![]()
Je kunt je uiteindelijke installatie maken met een Makey Makey of een Arduino. Deze workshop leert je de basis van hoe je deze kunt gebruiken om bestaande circuits te hacken. Neem je eigen techno-rommel mee die je wilt hacken of openen. Het makkelijkst is om iets met een knop mee te nemen!
Om je voor te bereiden op de workshop installeer de volgende software:
Processing 4.4.1
Arduino Ide 2.3.6
You can make your final installation with a Makey Makey or a Arduino.
This workshop shows you the basic on how to use those to hack into existing circuits. Bring your own techno trash that you would like to hack or open up, easiest is to bring something with a button in it!
To get started with this workshop please download the following software:
Processing 4.4.1
Arduino Ide 2.3.6
![]()
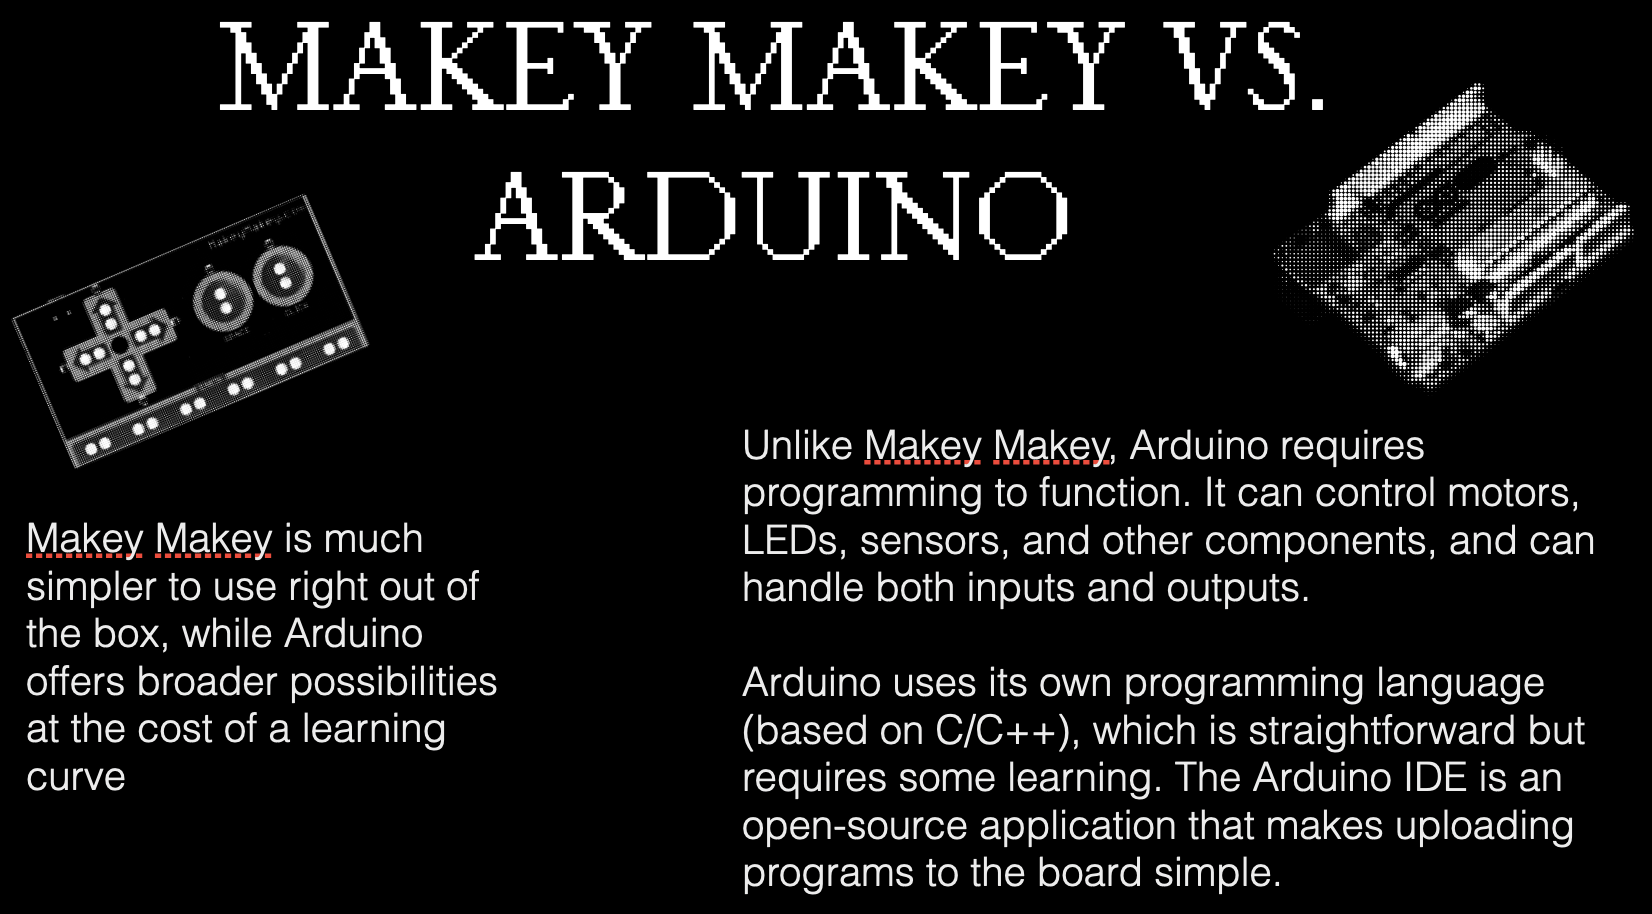
The Makey Makey works with conductive materials like:
Makey Makey project inspiration and resources
2/2 ARDUINO
![]()
Arduino is an open-source electronics platform based on easy-to-use hardware and software. It's designed for artists, designers, hobbyists, and anyone interested in creating interactive projects.
With Arduino, you can:
It’s the easiest way to bring ideas to life with both code and physical components!
![]()
This Processing sketch displays a fortune-telling interface that shows three random words and a background image, which change whenever the user presses the spacebar or when an external arcade button connected to an Arduino sends a "pressed" signal through the serial port.
The code is designed with extensive comments explaining how each part works, making it accessible and easy to modify.
![]()
HOMEWORK: PLAY WITH EXAMPLE PROCESSING CODES
![]() 1) Experiment, extend and have fun with Processing and your micro-controller.
1) Experiment, extend and have fun with Processing and your micro-controller.
For every theme there is a sketch (press spacebar to interact) in the following folder. You can also work with the Oracle Processing code with Arduino or Makey Makey.
2) Think about your interactive concept.
Think of 1 or 2 themes (inspired but not restricted to this list) for your generative art concept.
3) Documentation is key!
Start documenting your work, be sure you safe all your files and sketches – you need them in the future for your assessments!
︎︎︎ Start collecting data like graphics/screenshots/photos etc. Having your own dataset will help you narrowing down the story you want to tell, but is also very useful for the content of your (generative) installation.
Extra
About Circuits and Electricity
![]()
![]()
![]()
Mail Ymer: ymer@thelivingvoid.nl
Mail Cyanne: info@cyannevdh.nl
In dit skills blok onderzoek je hoe je
interactieve en generatieve tools in kan zetten
in de fysieke wereld om je verhaal te vertellen.
︎︎︎ Terug naar de hoofdpagine
workshop 1: arduino + makey makey + button hacking
Je kunt je uiteindelijke installatie maken met een Makey Makey of een Arduino. Deze workshop leert je de basis van hoe je deze kunt gebruiken om bestaande circuits te hacken. Neem je eigen techno-rommel mee die je wilt hacken of openen. Het makkelijkst is om iets met een knop mee te nemen!
Om je voor te bereiden op de workshop installeer de volgende software:
Processing 4.4.1
Arduino Ide 2.3.6
You can make your final installation with a Makey Makey or a Arduino.
This workshop shows you the basic on how to use those to hack into existing circuits. Bring your own techno trash that you would like to hack or open up, easiest is to bring something with a button in it!
To get started with this workshop please download the following software:
Processing 4.4.1
Arduino Ide 2.3.6
1/2 MAKEY MAKEY

The Makey Makey works with conductive materials like:
Metals, such as copper, steel, gold/silver, (pencil) graphite, alu foil, salt + liquids, such as salted water, dough or play-doh, organic (moist) material, such as humans, fruit, flowers etc.
Makey Makey project inspiration and resources
︎︎︎ How to use the Makey Makey
︎︎︎ Projects that use the Makey Makey for inspiration
︎︎︎ Get your own Makey Makey (if you end up using Makey Makey instead of Arduino - we will help you try selling your Arduino to the tech playground!)
There is a lot of nice software you can use to build interactive installations. Some of them work with keyboard triggers/shortcuts, that means no programming is needed. You just need a Makey Makey + the software, some examples are:
For fun: Play snake online to test your buttons :)
2/2 ARDUINO

Arduino is an open-source electronics platform based on easy-to-use hardware and software. It's designed for artists, designers, hobbyists, and anyone interested in creating interactive projects.
With Arduino, you can:
- Control LEDs and make light patterns or indicators
- Read sensors like temperature, light, or motion
- Control motors and servos for robots or machines
- Build smart systems like home automation or security alarms
- Make interactive art with sound, movement, or light
- Collect data from the environment and store or display it
It’s the easiest way to bring ideas to life with both code and physical components!
MAKING YOUR OWN ARCADE ORACLE WITH ARDUINO
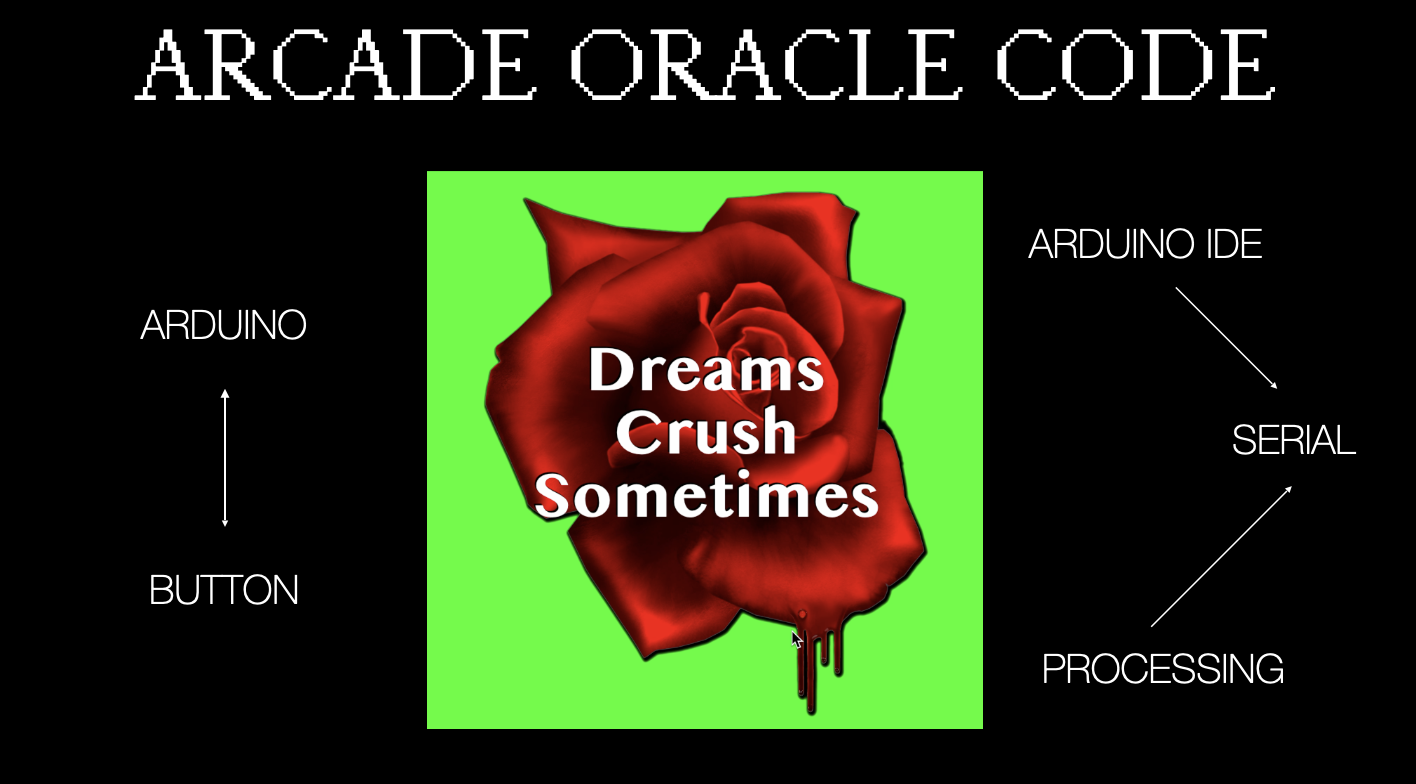
This Processing sketch displays a fortune-telling interface that shows three random words and a background image, which change whenever the user presses the spacebar or when an external arcade button connected to an Arduino sends a "pressed" signal through the serial port.
The code is designed with extensive comments explaining how each part works, making it accessible and easy to modify.
A) Install Software
Arduino 1) Download and open Arduino software: https://www.arduino.cc/en/software
2) Open the software, under “Extra”: make sure your board is set to Arduino Uno, and your serial port is linked to the one your Arduino is plugged in.
3) Download and open the Arduino sketch named: buttonserial.ino: https://rb.gy/k2wpkf
4) Upload this to your Arduino by clicking on the arrow to the right!![]()
Processing (dit installeer je om je installatie in te coderen)
1) Download Processing hier: https://processing.org/
2) Open the software, under “Sketch” click “Import Library”, “Manage Libraries” en installeer: Serial.
Now your Arduino is compatible with Processing! :)
2) Open the software, under “Extra”: make sure your board is set to Arduino Uno, and your serial port is linked to the one your Arduino is plugged in.
3) Download and open the Arduino sketch named: buttonserial.ino: https://rb.gy/k2wpkf
4) Upload this to your Arduino by clicking on the arrow to the right!

Processing (dit installeer je om je installatie in te coderen)
1) Download Processing hier: https://processing.org/
2) Open the software, under “Sketch” click “Import Library”, “Manage Libraries” en installeer: Serial.
Now your Arduino is compatible with Processing! :)
B) Download Processing sketch: Oracle
1) Download this folder: https://rb.gy/k2wpkf
2) There is one folder named OracleSerialWithExplanation (that has the explanation of every line of code used). Open this folder and open: OracleBasicWithExplanation.pde
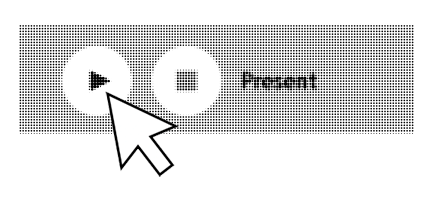
3) Make sure you Arduino software is closed and click on play:
![]()
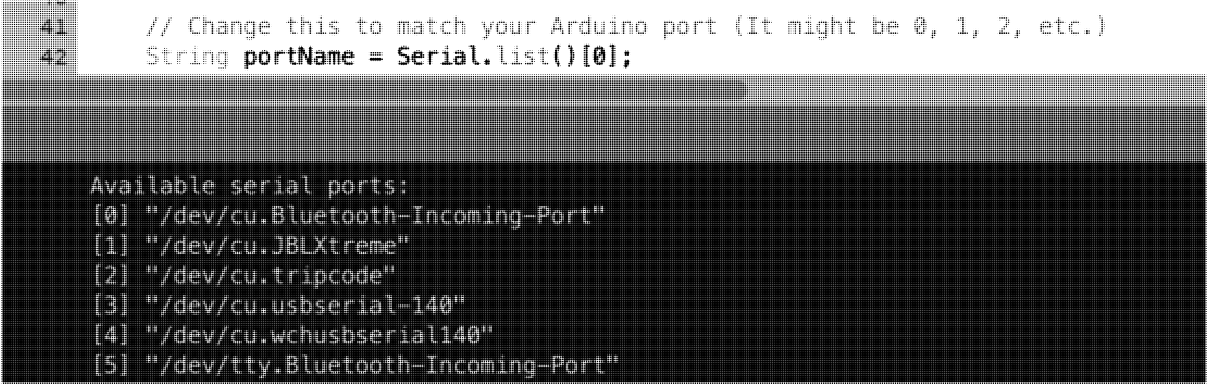
4) Your button will not work, because you need to set the serial port name in (line 42 of) the code.
In your console it prints something like this:
![]()
Set in line 42 the corresponding number of the Arduino (it has the same name as in the software. In my case it’s [3] because its usbserial-140.
String portName = Serial.list()[3];
Not sure what the name is check it in the Arduino Software or try out when in doubt.
5) Voila! Your button works now when you plug it in.
Some basic tips to work with the Processing sketch:
︎︎︎ Your code also works with pressing the spacebar, so you can easily switch to Makey Makey.
︎︎︎ You can change the images in the data folder (by replacing them with a file with the same name and filetype)!
︎︎︎ You can change the texts by changing the words at line 18, 19 and 20.
︎︎︎ Make sure boolean useArduino is set to true when you want to use your Arduino.
︎︎︎ Use // to uncomment(disable) parts of the code to see what changes.
︎︎︎ Use println(“whatever you want to print goes here”); to get insights into how the code works. Change numbers to see what they do in the code.
︎︎︎ Also with Sketch->import Library… ->add library . You can find loads of cool codes. And after you've imported the library you can go to File->Examples . Here you can see all kinds of examples for spells that you can learn and use (copy).
2) There is one folder named OracleSerialWithExplanation (that has the explanation of every line of code used). Open this folder and open: OracleBasicWithExplanation.pde
3) Make sure you Arduino software is closed and click on play:
4) Your button will not work, because you need to set the serial port name in (line 42 of) the code.
In your console it prints something like this:
Set in line 42 the corresponding number of the Arduino (it has the same name as in the software. In my case it’s [3] because its usbserial-140.
String portName = Serial.list()[3];
Not sure what the name is check it in the Arduino Software or try out when in doubt.
5) Voila! Your button works now when you plug it in.
Some basic tips to work with the Processing sketch:
︎︎︎ Your code also works with pressing the spacebar, so you can easily switch to Makey Makey.
︎︎︎ You can change the images in the data folder (by replacing them with a file with the same name and filetype)!
︎︎︎ You can change the texts by changing the words at line 18, 19 and 20.
︎︎︎ Make sure boolean useArduino is set to true when you want to use your Arduino.
︎︎︎ Use // to uncomment(disable) parts of the code to see what changes.
︎︎︎ Use println(“whatever you want to print goes here”); to get insights into how the code works. Change numbers to see what they do in the code.
︎︎︎ Also with Sketch->import Library… ->add library . You can find loads of cool codes. And after you've imported the library you can go to File->Examples . Here you can see all kinds of examples for spells that you can learn and use (copy).
C) Hardware
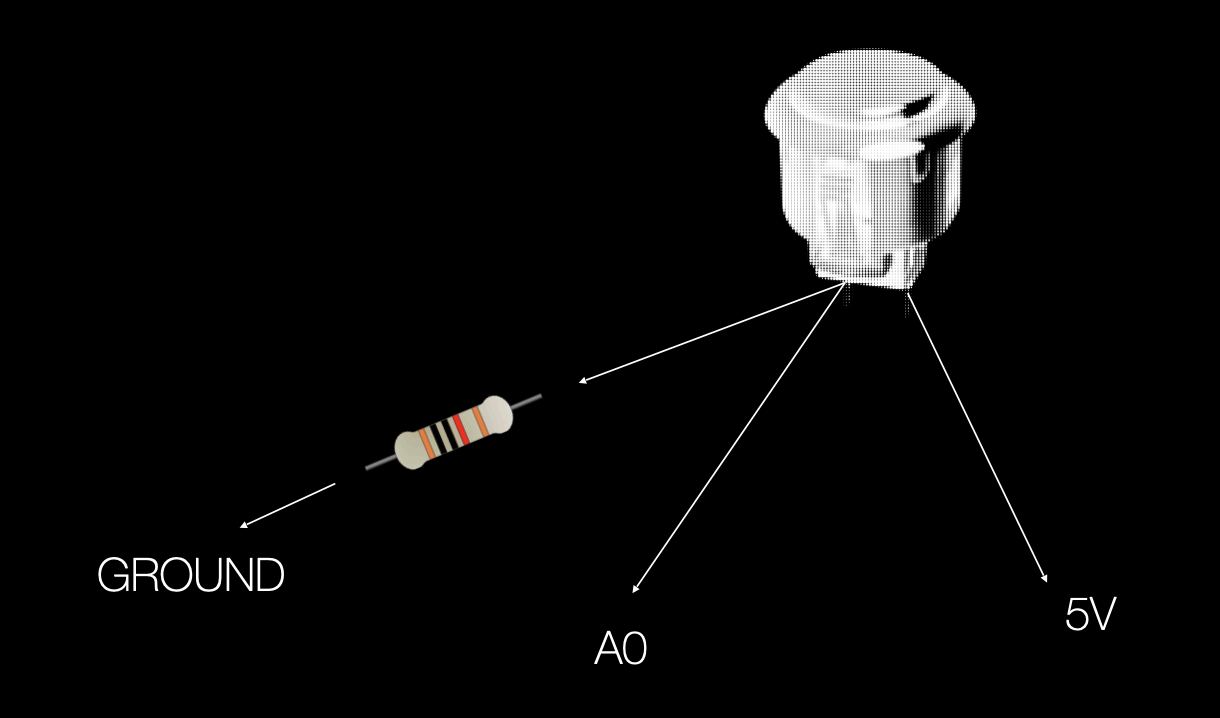
Wire the button to your Arduino, your button has two connections.
︎ Connection 1: Single wire that goes to 5 v
︎ Connection 2: Two wires: Wire 1 is connected to resistor and goes to ground (GND). Wire two is next to resistor (10kΩ) and goes to A0.
Solder the wires to make sure they last!
︎︎︎Tutorial video: How to Solder
Is your button connected? Now your Oracle Processing sketch should work if you hit play!
Didn’t get it to work after class hours? Try pasting your error into a LLM like Claude for help, send us a screenshot by clicking this link or bring it next week!
HOMEWORK: PLAY WITH EXAMPLE PROCESSING CODES
 1) Experiment, extend and have fun with Processing and your micro-controller.
 For every theme there is a sketch (press spacebar to interact) in the following folder. You can also work with the Oracle Processing code with Arduino or Makey Makey.
2) Think about your interactive concept.
Think of 1 or 2 themes (inspired but not restricted to this list) for your generative art concept.
- How do the theme(s) relate to what you want to achieve with your interaction?
- What function will your button/sensor have?
- What is the role of the person interacting with your design?
3) Documentation is key!
Start documenting your work, be sure you safe all your files and sketches – you need them in the future for your assessments!
︎︎︎ Start collecting data like graphics/screenshots/photos etc. Having your own dataset will help you narrowing down the story you want to tell, but is also very useful for the content of your (generative) installation.
Extra
︎︎︎ Try to connect your sensor! Check out the Sensor Guide to see if your sensor is there. If not, the internet is your best friend, almost everything has been done - so looking up videos and tutorials of how people use this sensor can help you a lot. Also sometimes on the Hackerstore website there is a link to a tutorial for the particular sensor.
About Circuits and Electricity


Mail Ymer: ymer@thelivingvoid.nl
Mail Cyanne: info@cyannevdh.nl